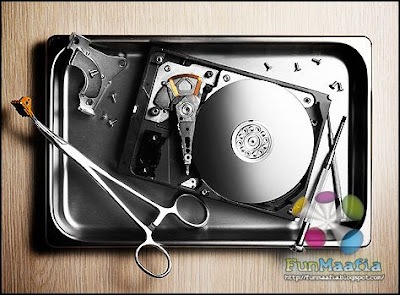
Hard Drive Recovery or repair is almost a misnomer. Once a hard drive begins to fail nothing can stop it. There are, however, options that may save your data's life.
Common Causes/Symptoms of Data Loss in HDD Drives
• Computer won't boot
• Inaccessible drives and partitions
• Applications that are unable to run or load data
• Corrupt files/data
• Bad sectors
• Virus Attack
• Hard disk drive component failure
• Hard Drive Crash
• Fire or water damage
• Media surface contamination and damage
• Accidental reformatting of partitions
• Accidentally deleted files
Data Recovery Techniques
Basic questions which needs to be answered before recovery process
1. What is the data which needs to be recovered?
2. What type of hard drive is it?
3. How much data is on the hard drive?
4. What happened when the drive failed?
5. How fast do you need the data?
Recovering critical data is a specialized process that requires the right software, hardware and advanced techniques. In many failure-related cases, the chances of recovering data from a damaged hard drive range from 90-100%. If the electronic system is the only thing affected, then the drive can often be reused after the electronic control panel has been replaced. If, on the other hand, the defect is of a mechanical nature, then recovery will be a bit more difficult, which can be taken care at any Data Recovery Companies lab.
If it is problem related to the file system, which has caused inaccessibility of the data then it can be recovered using Data Recovery Software, an independent review has been posted on my website which lists the best in the field and helps you to identify the correct solution.
Hard Drive Recovery Tips
The first and most firm rule of thumb for preventing a loss of your data is to do complete and regular Hard Drive Backups! This is also the rule that most people do not bother to follow. Today, with a multitude of options for backing up your hard drive there really is no excuse for not doing so. Cheap and affordable USB hard drives can act as redundant storage for your computer, making copies of your entire hard disc drive with the push of a button. A flash drive itself can be used as a backup medium for smaller amounts of personal files as well.
On a regular basis every computer owner should run the Scandisk utility that is included with your Windows installation. Right click on your hard drive's icon, select Properties, select the Tools tab, and click on Error Checking. This utility scans your hard drive for areas that have corrupted information. Such sectors of bad data are often a prelude to a looming hard drive failure. If bad sectors are found you should immediately back up your data and consider replacing the drive in the future.
If your hard disc drive has shown the final warning signs of failure and will not allow your computer to boot you have very few options.
• If possible, backup your most important data immediately.
• Disregard your program files and other software as it can be reinstalled from your original discs.
• Save the data that cannot be replaced first.
If the computer has stopped working or refuses to boot up turn the computer off, unplug it, open it up, and carefully remove the hard disc drive from the case. Place the hard drive in a zippered freezer bag, seal it tightly while pressing out as much air as possible, and THROW IT IN THE FREEZER.
Leave the hard drive in the freezer for 24 hours. In the meantime, go to a working computer and download a shareware copy of Hard Drive Mechanic and install the software onto a blank floppy disk.
The next day, reinstall the hard drive as quickly as possible, boot the computer from the floppy disk you copied the Hard Drive Mechanic to, and start it up. With luck, the drive may continue to work long enough for you to backup your files, but the Hard Drive Mechanic software is there to help you should there be no other option left.
Computer Data Recovery Safety Tips
If your system has "crashed" and you can no longer access the operating system or see the drive in the BIOS, then shut the system down immediately and do not run any further power through the drive by attempting reboots. This is considered a physical problem with the drive and is an extremely sensitive issue. If the head stack inside your drive has been damaged, you may cause further additional damage to the platter/s of the drive, upon which your data is stored.
If you have deleted a file or files or accidentally formatted your drive, then the most important thing to remember is to NOT write or install ANY new information onto that drive. Deleting files simply removes the locating tag of the file, but the file is still intact on the drive. If you add new data to the drive, you may over-write your lost data; losing it forever. Using advanced software or contacting Data Recovery Expert can re-assemble the binary code and restore your files.
If your partition has become corrupted, the most important thing to remember is NOT to attempt a re-install of your operating system or add new data to the drive. Again, contact Data Recovery Expert to use specialized software and techniques to repair the partition and/or extract your data.
If you have deleted a partition, do not attempt to restore it by formatting the drive as this will only result in the addition of an empty partition. It will not recover your data.
If you experience a single file corruption, be sure not to attempt creating a new file with the same name as this will partially over-write the file and will greatly decrease our ability to recover fully.
Though computers are widely used not many people know what to do in the event of a computer breakdown. How you handle your data recovery process will determine whether information is salvaged or permanently lost. This procedure should ONLY be attempted by a Data Recovery Specialist.
Note: IF YOUR SYSTEM HARD DRIVE EMITS UNUSUAL NOISES (CLICKING, GRINDING OR METAL SCRAPING), TURN IT OFF IMMEDIATELY! This symptom typically indicates a head crash that can destroy your data. Hard drives spin with extreme speed; therefore, wide damage can occur in a short period of time. Contact Data Recovery Specialists immediately, as this situation demands professional recovery.


